Heyy, I’m back!! This time we’re stepping into the world of protocols, specifically I2C. Let’s break it down together :3
I2C (Inter-Integrated Circuit) is a communication protocol that allows multiple devices to talk to each other using only two wires—SDA (data) and SCL (clock). In this experiment, we’re required to connect two or more devices to the ESP32 using communication protocols. Let’s begin!
1. Scan I2C Address with ESP32
Before we can use any I2C device, we need to know its address first. Every I2C device has a unique hex address (like 0x3C or 0x77). The problem is, what if you don't know it? That's where the I2C Scanner comes in!
This is the wiring configuration that I used (same as the project before this).
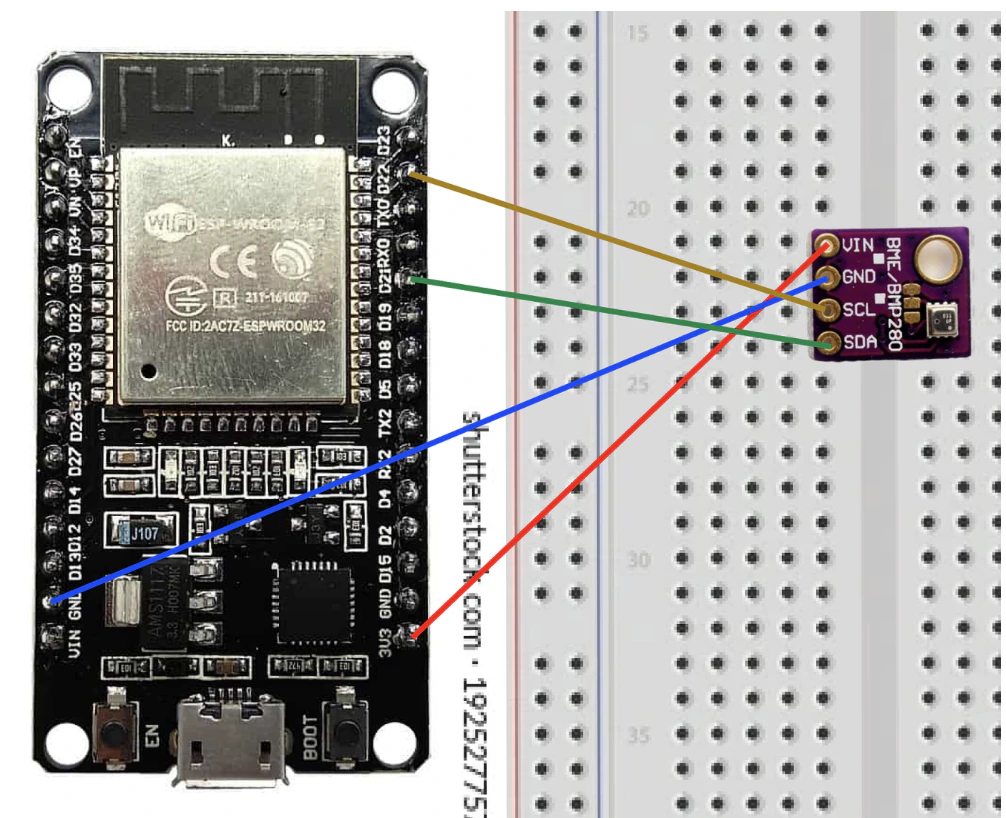
This code basically loops through all 127 possible I2C addresses and tries to "knock" on each one. If a device responds, it prints the address to the Serial Monitor. If nothing responds, it says "No I2C devices found."
#include <Wire.h>

void setup() {
  Wire.begin();
  Serial.begin(9600);
  Serial.println("\nI2C Scanner");
}

void loop() {
  byte error, address;
  int nDevices;

  Serial.println("Scanning...");
  nDevices = 0;

  for (address = 1; address < 127; address++) {
    Wire.beginTransmission(address);
    error = Wire.endTransmission();

    if (error == 0) {
      Serial.print("I2C device found at address 0x");

      if (address < 16) {
        Serial.print("0");
      }

      Serial.println(address, HEX);
      nDevices++;
    }

    else if (error == 4) {
      Serial.print("Unknown error at address 0x");

      if (address < 16) {
        Serial.print("0");
      }

      Serial.println(address, HEX);
    }
  }

  if (nDevices == 0) {
    Serial.println("No I2C devices found\n");
  }

  else {
    Serial.println("done\n");
  }

  delay(5000);
}
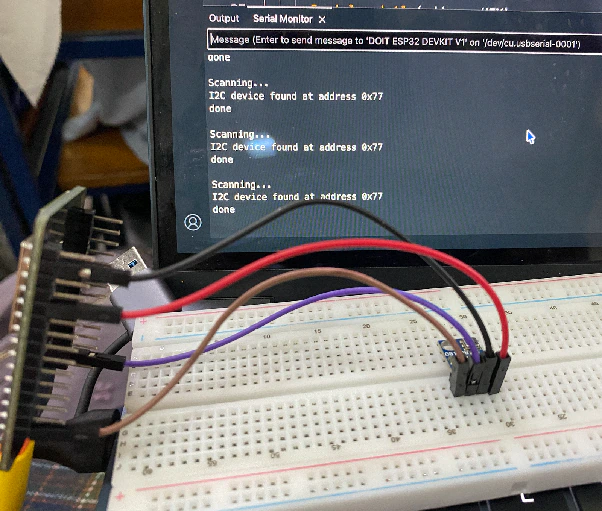
After uploading the code, open the Serial Monitor (set baud rate to 9600). If your device is connected correctly, you'll see its address printed out. In my case, I got 0x77 for the BME280 sensor. If you see nothing, check your wiring first. Yep, I learned that the hard way 😅
2. Change Default I2C Pins
By default, ESP32 uses pin 21 for SDA and pin 22 for SCL. But sometimes, those pins are already occupied by something else in your project. The good news? We can change them!
In this session, I changed the I2C pins to SDA = 33 and SCL = 32. To do this, instead of calling Wire.begin(), we define a new TwoWire object and pass in our custom pins.
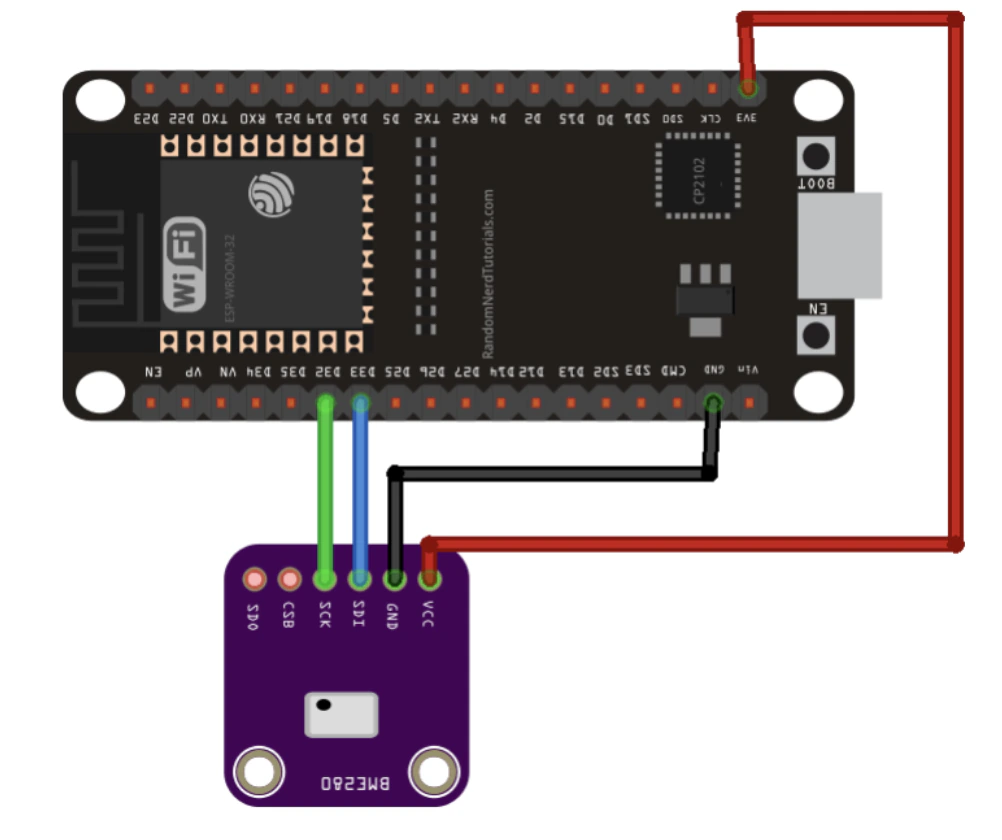
Here’s the code I used to read temperature, pressure, altitude, and humidity from the BME280 sensor with the custom I2C pins:
#include <Wire.h>
#include <Adafruit_Sensor.h>
#include <Adafruit_BME280.h>

#define I2C_SDA 33
#define I2C_SCL 32

#define SEALEVELPRESSURE_HPA (1013.25)
TwoWire I2CBME = TwoWire(0);
Adafruit_BME280 bme;
unsigned long delayTime;

void setup() {
  Serial.begin(9600);
  Serial.println(F("BME280 test"));
  I2CBME.begin(I2C_SDA, I2C_SCL, 100000);
  bool status;
  status = bme.begin(0x77, &I2CBME);

  if (!status) {
    Serial.println("Could not find a valid BME280 sensor");
    while (1);
  }

  Serial.println("-- Default Test --");
  delayTime = 1000;

  Serial.println();
}

void loop() {
  printValues();
  delay(delayTime);
}

void printValues() {
  Serial.print("Temperature = ");
  Serial.print(bme.readTemperature());
  Serial.println(" *C");

  /*Serial.print("Temperature = ");
  Serial.print(1.8 * bme.readTemperature() + 32);
  Serial.println(" *F");*/

  Serial.print("Pressure = ");
  Serial.print(bme.readPressure() / 100.0F);
  Serial.println(" hPa");

  Serial.print("Approx. Altitude = ");
  Serial.print(bme.readAltitude(SEALEVELPRESSURE_HPA));
  Serial.println(" m");

  Serial.print("Humidity = ");
  Serial.print(bme.readHumidity());
  Serial.println(" %");

  Serial.println();
}
Note that I used address 0x77 here, which is what my BME280 returned from the scanner earlier. If yours returns 0x76, make sure to change it accordingly! One of my early mistakes was hardcoding the wrong address and wondering why the sensor wasn't responding 🤦
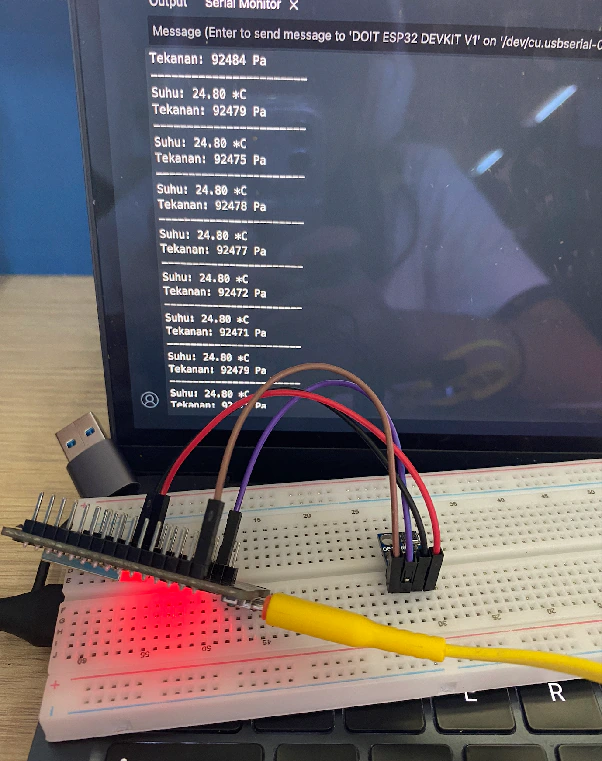
TADAA!!! Here’s the result.
3. Multiple Serial Devices
Okay, now for the most satisfying part, using two I2C devices at once! In this session, I used the BME280 (temperature & humidity sensor) and an OLED display (SSD1306) together. The goals are to read the sensor data and display it live on the OLED. (dingin bang 🥶)
Both devices use the I2C protocol, so they share the same SDA and SCL lines. The key is that they have different addresses. The BME280 is at 0x77 and the OLED is at 0x3C. That's how the ESP32 knows which one to talk to at any given moment.
I had a bit of a struggle here. At first, the OLED wasn’t showing anything. I checked the wiring, re-uploaded the code, checked the wiring again… everything seemed fine. The problem is, I initially used a BMP180 sensor, but it turned out to be damaged. After switching to a BME280, everything finally worked.
#include <Wire.h>
#include <Adafruit_GFX.h>
#include <Adafruit_SSD1306.h>
#include <Adafruit_Sensor.h>
#include <Adafruit_BME280.h>

#define SCREEN_WIDTH 128
#define SCREEN_HEIGHT 64

Adafruit_SSD1306 display(SCREEN_WIDTH, SCREEN_HEIGHT, &Wire, -1);
Adafruit_BME280 bme;

void setup() {
  Serial.begin(9600);

  if (!display.begin(SSD1306_SWITCHCAPVCC, 0x3C)) {
    Serial.println(F("SSD1306 allocation failed"));
    for (;;);
  }
  bool status = bme.begin(0x77);

  if (!status) {
    Serial.println("Could not find a valid BME280 sensor, check wiring!");
    while (1);
  }

  delay(2000);
  display.clearDisplay();
  display.setTextColor(WHITE);
}

void loop() {
  display.clearDisplay();

  display.setTextSize(1);
  display.setCursor(0, 0);
  display.print("Temperature: ");

  display.setTextSize(2);
  display.setCursor(0, 10);
  display.print(String(bme.readTemperature()));
  display.print(" ");

  display.setTextSize(1);
  display.cp437(true);
  display.write(167);

  display.setTextSize(2);
  display.print("C");

  display.setTextSize(1);
  display.setCursor(0, 35);
  display.print("Humidity: ");

  display.setTextSize(2);
  display.setCursor(0, 45);
  display.print(String(bme.readHumidity()));
  display.print(" %");

  display.display();

  delay(1000);
}
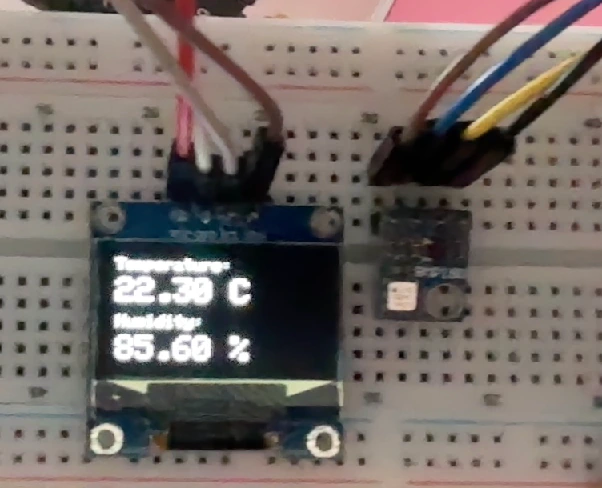
And it worked!!! The OLED was showing real-time temperature and humidity data from the BME280, updating every second. Genuinely one of the most satisfying moments in this IoT journey so far 🥹 Like, seeing data from the physical world appear on a tiny screen just hits different.
That’s it for this fifth project! The I2C protocol is honestly so satisfying once you understand it. Can’t wait to use this in bigger projects.